What do I need to prepare?

We have tried to design this lab using only household items, so hopefully you will have access to most of these items. You will need:

Smartphone

Ideally a smartphone with a front camera, but a back camera can be used too.

Empty plastic bottle or clingfilm

These will be useful to protect your camera from getting wet.

Something to image

Something interesting to take pictures of. Leaves or onion skins work well.

Paper towels

These will be useful for mopping up any water spillages.

Scissors

If using a plastic bottle, these will be useful to cut the bottle in half.

Sugar / Vegetable Oil

(Optional) These can be used to change how the water droplet affects the image.

Headphones

(Optional) If you want to take some pictures, the headphones can be used as a shutter button.

Torch

(Optional) A second phone or torch can be used to back-light your sample and improve the images.

Step by Step

Water Bead Macrophotography Instructions

Protecting your phone: If you are using the front camera

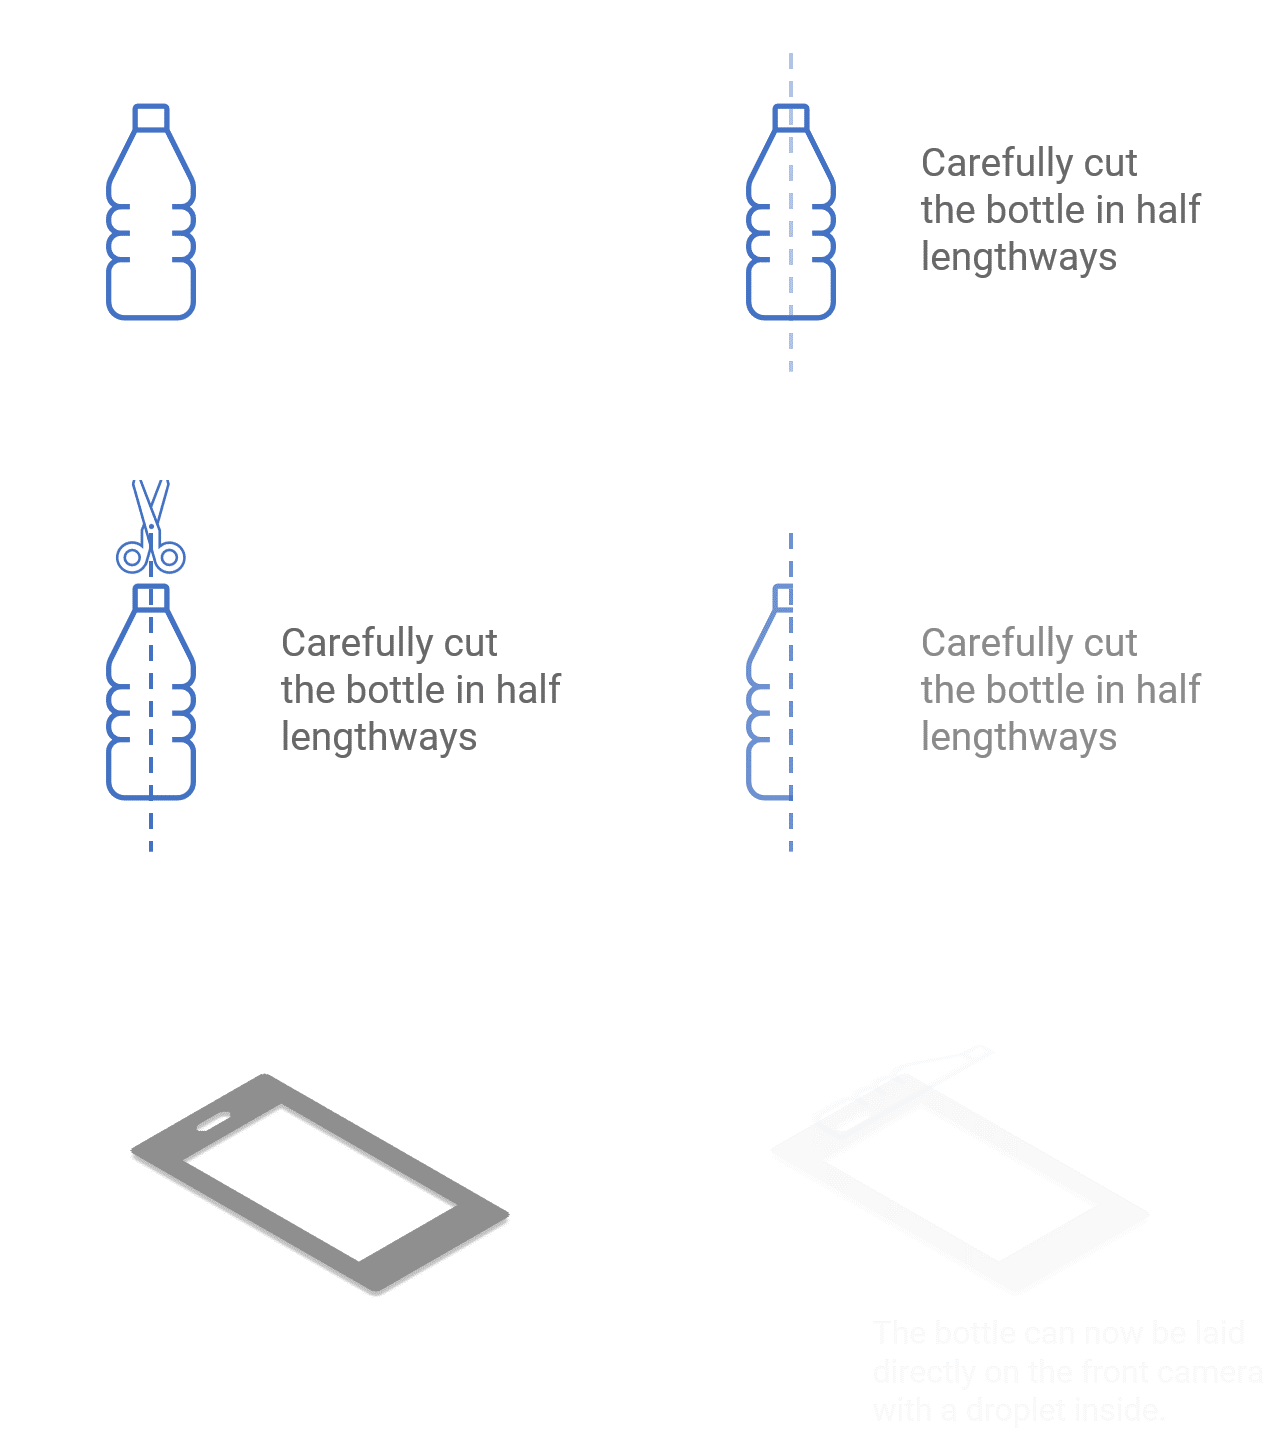
If you are using the front camera of your phone you can use a clear plastic bottle to hold the water droplets. This should minimise spillage on to the phone, and makes it easier to change the size of the droplets:

  1. Carefully cut the bottle in half length-ways using a pair of scissors
  2. Lay the bottle on top of your phone. Trim it down a little more if required
  3. Put a few droplets of water in the bottle. You can create bigger or smaller droplets by moving the bottle around
Protecting your phone: If you are using the back camera

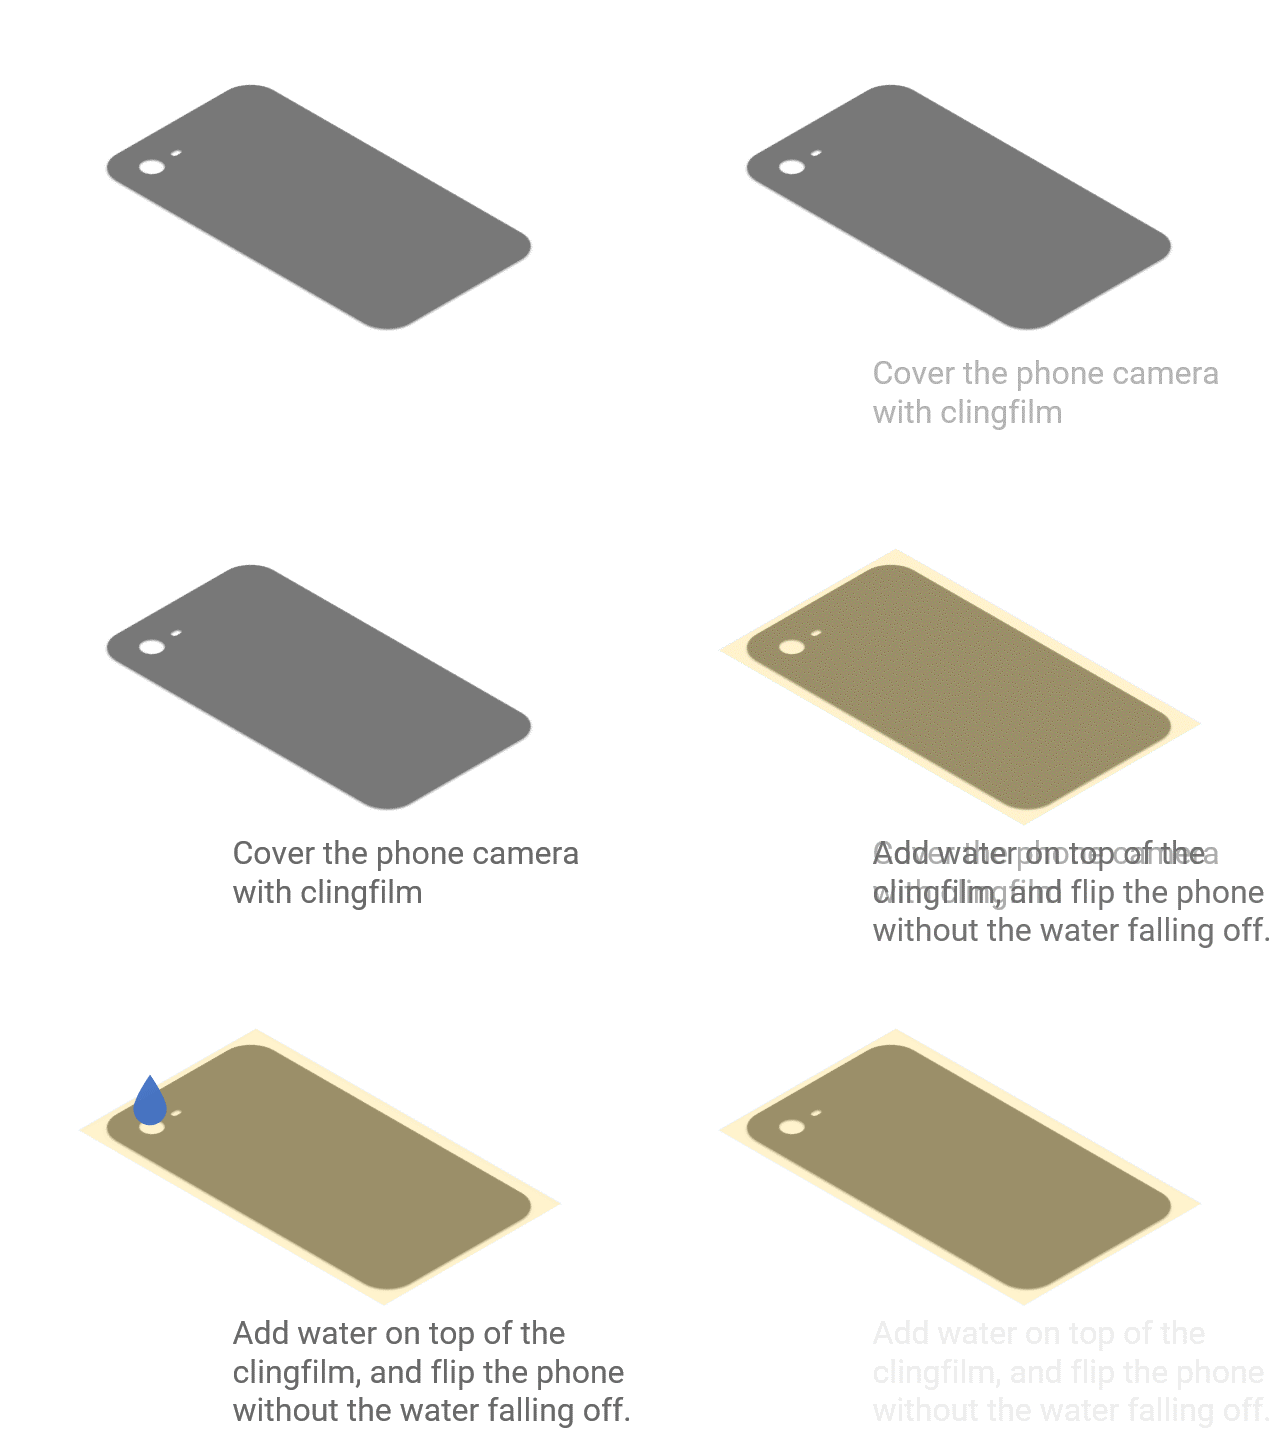
Using the back camera of your phone will be a little more difficult, because you will need to keep the droplet from falling off, but it does give a more pronounced magnification effect because gravity helps to curve the surface of the droplet. Applying clingfilm helps the droplet to stick to your camera and protects your phone:

  1. Cover your camera and speaker with a clingfilm.
  2. Place a water drop on your camera. Ensure the water drop covers the whole camera
  3. Flip the phone over, trying to ensure the droplet stays on the camera
Capture some images
  1. Once you have a water drop in place over the camera, take an object you want to take a picture of (e.g. a leaf) and move the object back and forth in front of the camera until you find a distance which gives you the clearest image.
  2. If you are using the second device for the backlight, use volume buttons on the device or headphones, or a Bluetooth control to take a picture.
Changing the water bead
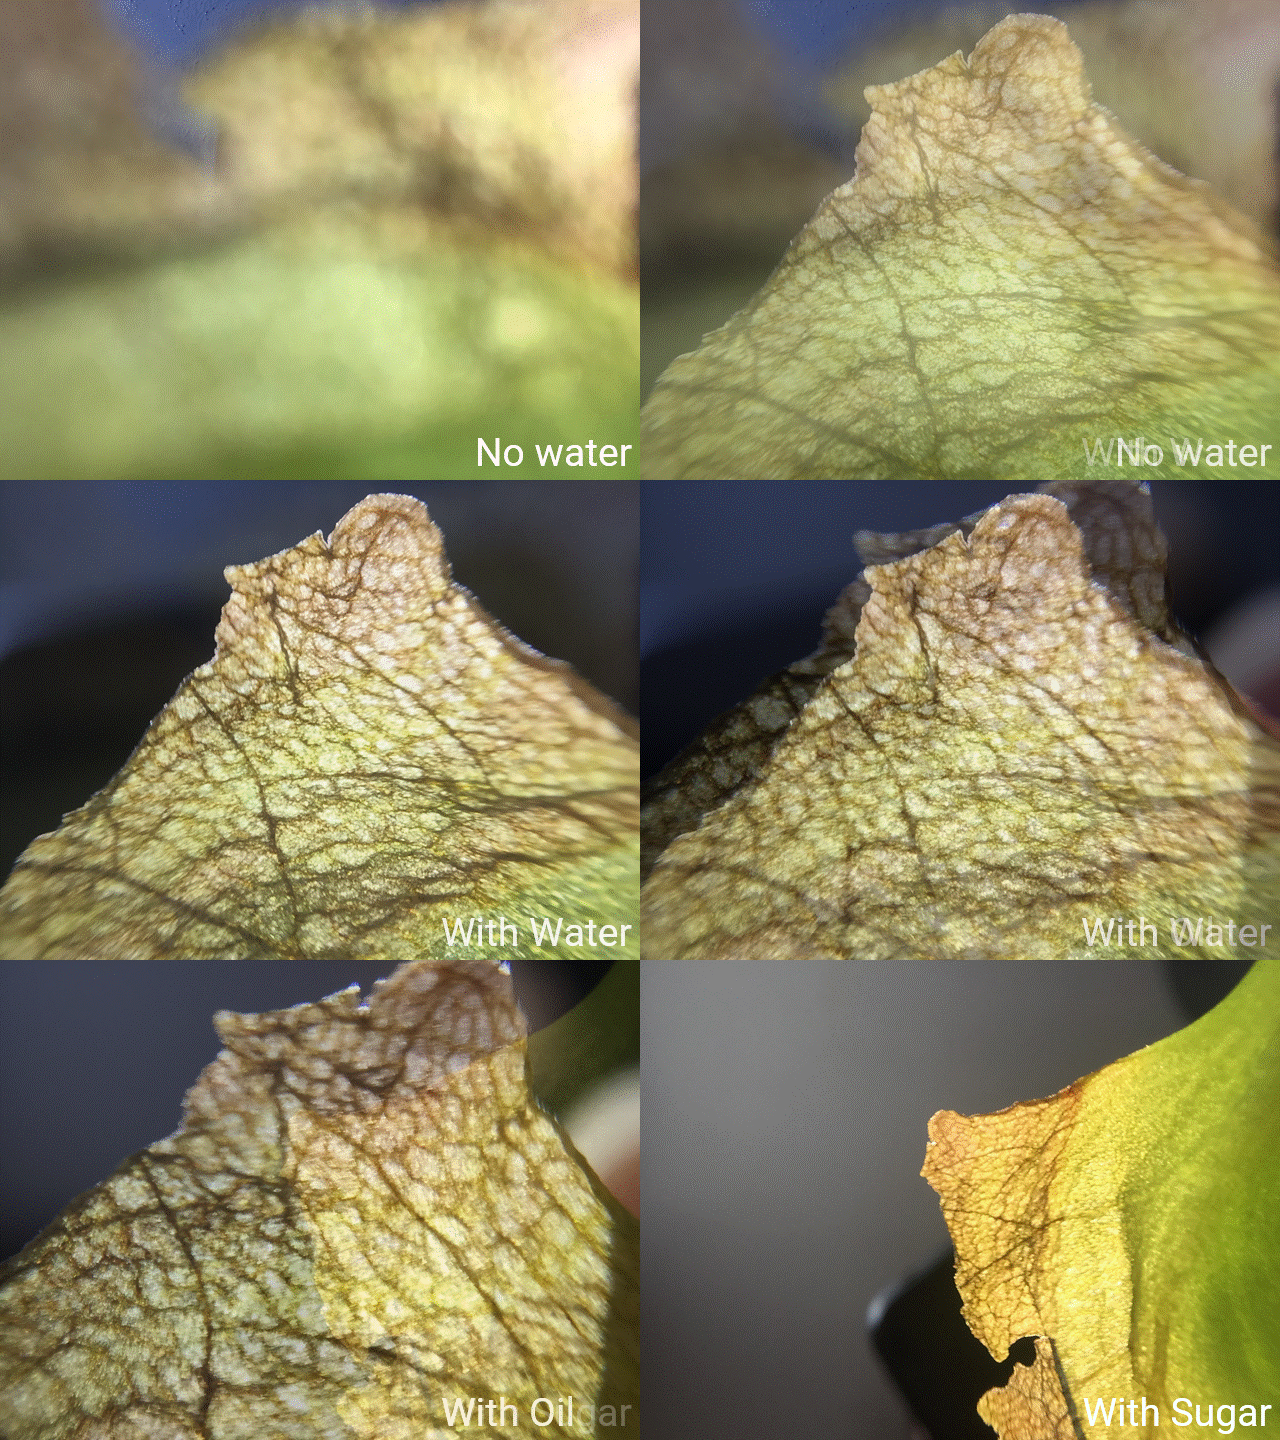
  1. Once you have tried taking some images, try making smaller water beads. Again, move your object back and forth until you get the clearest image. Did the size of the water bead affect the image resolution? You should notice that smaller droplets with more curvature will bring objects into focus closer to the camera.
  2. As we discussed earlier, different materials have different refractive indexes, which will affect how they bend light. Try replacing the water droplet with an oil droplet, or adding some sugar to the water droplet and see how close the camera will focus

How does this experiment work?

This experiment works because light rays move at different speeds in different substances.

Light rays slow down and change direction when they enter materials that have a higher density than air. The amount that a substance will bend light rays is called a substance’s refractive index. While this may sound technical, you’ve seen refraction at work many times. Have you ever noticed that your legs look strangely bent when you’re dangling them in a pool? This is because the light is being refracted when it hits the water.

When a light passes through a curved surface the light will bend by different amounts, which results in the light rays converging or diverging. This is how a magnifying glass works. Magnifying glasses are convex lenses, which cause light to refract and converge. This means that the object seen through the magnifying glass appears to be larger.

The water droplet is acting like a magnifying glass

The lenses in a mobile phone are set to focus at a certain distance. Any object that is closer than the camera's minimum focus distance will be out of focus.

It's easy to test this, if you hold a leaf close to the phone, the phone will not be able to focus on it closer than 5 or 6cm. By adding a water droplet above the lens, we reduce the minimum focus distance.

The water droplet acts similarly to how a magnifying glass would work, bending the light rays and causing them to converge closer. This means that objects that are closer to the camera remain in focus.

Thanks for reading!

Click the button below to start the lab!

Go to lab